How to Make a USB Composite Device with HIDmaker FS - Part 2
In our last installment, we covered these concepts:
- What a USB Composite Device IS,
- Why you might want to make one,
- Some of the different ways the different USB Interfaces in your Composite device might or might not relate to each other,
- And we began to talk about HOW you can easily make a USB Composite Device.
Today we're going to go into more detail, and actually show you how to quickly build up a USB Composite Device using HIDmaker FS . As we go along, we'll show some things to watch out for, and some tricks that can help you along the way. Today we'll build up a device that contains two USB Interfaces, neither one of which is a keyboard or a mouse. Adding a third USB Interface (if you need to) is straightforward, as we'll show below.
If one or more of your USB Interfaces is a mouse or a keyboard, there are some special considerations to be aware of - we'll discuss those in our next installment (Part 3) of this tutorial.
Building a USB Composite Device Using HIDmaker FS
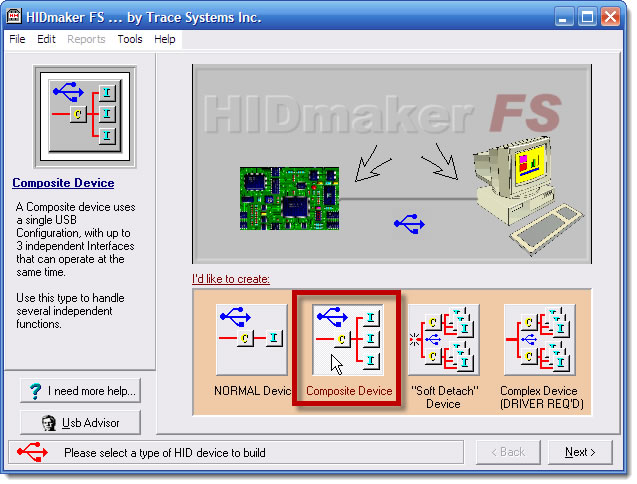
Step 1 - On the first page of the HIDmaker FS wizard, choose a Composite device, and click Next
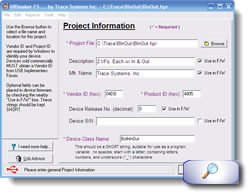
Step 2 - Fill in project information as normal, and click Next
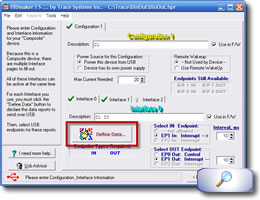
Step 3 - Notice that there are now multiple tabs at the bottom of the Configuration and Interfaces page of the HIDmaker FS Wizard.
Step 4 - Click the tab for the first Interface, to select the tab page for that Interface. Click the Define Data button.
Step 5 - In the Visual Data Designer , either add the data items you want this Interface to have, OR open a .rdi file that contains them.
As we have shown elsewhere on this web site, in HIDmaker FS you can create a new data item by clicking on the icon in the palette on the left, and then clicking on the drawing area to place a data item, which is represented by that small icon.
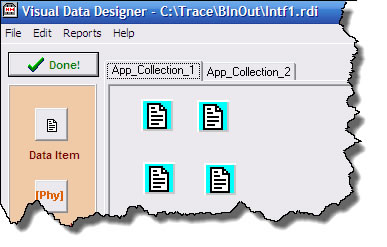
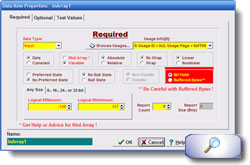
Once the data item is in place, you can double click on the icon and set the data item's properties, on the dialog box that comes up:
Quick Tip: Sometimes you might want to have an interface that is "almost like" an existing Interface from a previous HIDmaker project, except that you might need to add a variable or two, or change some properties of one or more of the variables from your existing Interface, to meet a new design requirement.
That's easy to handle. Just tell the Visual Data Designer to open the .rdi file that contains the Interface Data Set from that other project, and after the variables have been read in, you can make any edits that you please - add some new data items, or change any properties of one or more items, or make any other changes you please. When you're done with your changes, of course we recommend that you save the modified data set to a new file with a descriptive new name.
Important Note for Composite Devices: Every data item that you create in HIDmaker FS becomes what we call a Transfer Variable. A Transfer Variable is something that acts like a named shipping container, using our principle of Direct Transfer of Variables . This has important ramifications for your USB Composite Device:
- First, each data item must have a unique name - unique throughout this whole HIDmaker project, not just within this one USB Interface . That's important because your compilers (on both the peripheral side and the PC side) use the variable's name to distinguish it from all the other variables in your program, and particularly from all other Transfer Variables that will send data over the USB. You wouldn't want your compiler to send your data to the wrong place, would you?
- Secondly, each data item must have a unique Usage (that is, a unique combination of Usage Page and Usage ID) - and again, this must be unique throughout this entire HIDmaker project, not just within this one USB Interface. This is important because the USB HID device driver doesn't know anything about your transfer variable's name (like maybe Pot1) - the device driver distinguishes each USB transfer variable from all the others by its Usage Page and Usage ID.
Don't worry too much about this. HIDmaker will check your data items for you, flag any problems, and it will enforce these rules. If you have a conflict in either the name or Usage of any of your Transfer Variables (even though they may be in different Interfaces), HIDmaker FS will tell you about it and require you to correct the problem before you'll be allowed to generate any code.
Step 7 - Right click on the drawing area and check the Usage Page and Usage ID of the Application Collection. Microsoft usually calls this the "Top Level Usage" - this is what tells the PC host what the overall function of this Interface is supposed to be. For example, if your Interface happens to be a keyboard, then you should set the Usage Page to "Generic Desktop" (= Usage Page 0x01) and set the Usage ID on this Usage Page to be "Keyboard" (= Usage ID 0x06). By default, HIDmaker FS will set this "Top Level Usage" to a Usage on one of the Vendor Defined Usage Pages.
Even if HIDmaker's Vendor Defined value seems OK to you, you must make sure that the Top Level Usage of the Application Collection of this USB Interface is unique within this whole HIDmaker project. That is, it must not conflict with that of any other Interfaces in your project.
Step 8 - Exit the Visual Data Designer (saving any changes you make to the data items) and select Input and Output endpoints as needed.
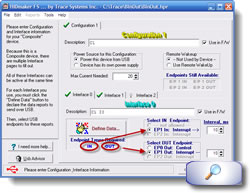
This USB Interface has an Input Report: we can tell because the word IN under the caption "Endpoint Types Required" is lit up in blue - we circled this in the picture below. We need an Input type of Endpoint to be able to send this data to the "In" to the PC, so we chose EP1 In (see arrow).
Similarly, the word OUT is enabled and shown in Blue (also circled in the image below), which means that this Interface has an Output Report. This USB Interface needs an Output Endpoint to receive the data that is sent "Out" from the PC, so we chose EP1 Out (see arrow).
Step 7 - Repeat steps 4 through 8 for each additional USB Interface you want to create.
Step 8 - Click the Next button to go to the Generate Code page of the HIDmaker FS Wizard. If HIDmaker finds any conflicts, it will tell you, placing an image on the tab for the Interface that has the problem, and it will not let you generate code until you have cleared up any conflicts.
Step 9 - On the Generate Code page, select at least one PIC compiler for the peripheral device, and at least one PC compiler for the PC host. Then click the Next button to generate and view the code for your USB Composite Device.
And that's it! You'll find, when you look at the generated code, that your USB Advisor has sprinked his usual comments and hints along the way, and has clearly identified the places where you should add your own code to customize your device.
Next Time: We'll talk about how HIDmaker's generated PC programs work with USB Composite Devices, and how they provide extra routines you can call if you want to talk to only one USB Interface at a time. We'll discuss some special things you'll need to do if at least one of the Interfaces in your Composite device happens to be a keyboard or a mouse. Finally, we'll show you some tricks you can do with USB Composite Devices, and some ways you can use them to sell upgrades to your customers.

Got a comment on what you just read? Let us know - just add a comment below.
We'd love to hear from you!

